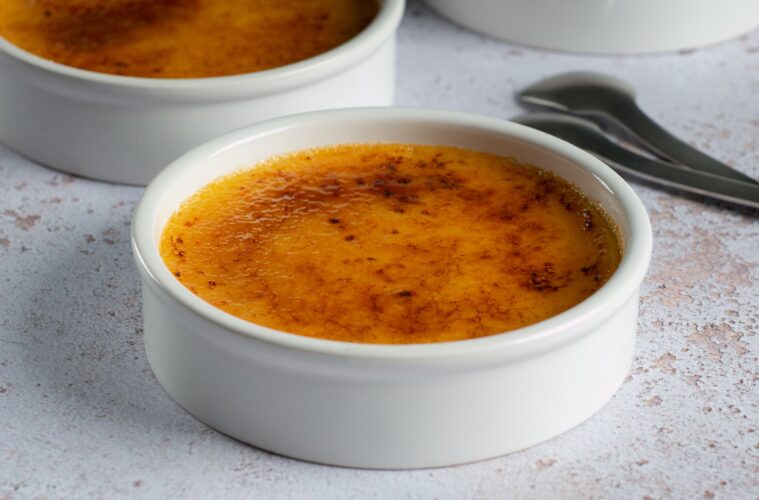
In the mood for a creamy and crunchy dessert? The classic crème brûlée recipe is the perfect dessert you are looking for. Super creamy custard with a little bit of crunch on top is just what you need to light up your mood.
Believed to be originated in France, England and in Spain, crème brûlée is a winner. Also popularly known as ‘trinity cream’ or ‘burnt cream’, crème brûlée is a heavenly dessert with a silky smooth vanilla custard base. Topped with super crunchy caramelised sugar that cracks when you gently tap on it with a spoon. This dessert looks quite simple, but requires a little bit of effort to make it look like a restaurant-quality dessert. But, don’t you worry. We will guide you through the process. Here’s the ultimate recipe for the classic homemade crème brûlée.
The Classic Crème Brûlée Recipe
- Servings: 6
- Prep time: 30 minutes
- Cooking time: 40 minutes
- Total time: 5 hours
- Chilling time: 4 hours
Ingredients
For the custard
- 2 cups of heavy whipping cream
- 4 egg yolks
- 10 tablespoons of sugar
- 1 vanilla bean or 1 teaspoon of vanilla extract
- ¼ teaspoon of kosher salt
For the brûlée topping
- 4 tablespoons of sugar for caramelising sugar
Method
- Get six 4-ounce ramekins and arrange them in a 9×13 baking tray.
- Preheat the oven to 325°F.
- If you are using a vanilla bean, place it on a hard surface, carefully split the bean in half, scrape out the seeds and set aside.
- Pour the 2 cups of heavy whipping cream into a medium saucepan and cook over medium heat. To the mixture add the vanilla bean seeds, the leftover vanilla pod or vanilla extract, 4 tablespoons of sugar and a pinch of salt. Gently stir the mixture until it simmers and take the saucepan off the heat.
- If you incorporated the vanilla bean pod and seeds into the mixture, after taking the saucepan off the heat, cover it with a lid and keep for about 15 minutes to let the cooked cream infuse the vanilla flavour from the pod and the seeds. If you are using vanilla extract you do not have to follow this step.
- Take the eggs and separate the yolks from the whites. You will only be using the yolks, so keep the whites for some other recipe.
- Whisk together the yolks and the 6 tablespoons of sugar in a medium-sized mixing bowl.
- While whisking the yolks and the sugar, slowly add the hot cream (add about ¼ cup of cream at a time) and continue to whisk the mixture. Adding hot cream slowly will avoid the eggs getting scrambled.
- Afterwards, strain the mixture using a mesh sieve into another mixing bowl or a large-sized measuring cup and discard everything that’s remaining in the sieve, including the vanilla pod if you used one.
- Take the arranged 9×13 baking tray and fill the ramekins with the custard mixture. When filling the ramekins, divide the custard mixture equally between the six 4-ounce ramekins, filling up to ¾ of a ramekin with the mixture.
- Pour hot water into the baking tray until the sides of the ramekins are filled at least halfway with hot water. Do this very carefully and don’t allow splashing of water into the custard.
- Put the baking tray with the ramekins in the oven and bake at 325°F for about 30-35 minutes. Make sure not to overbake them.
- When the custards are set with a slight wiggle in the middle you can take them out from the oven.
- Leave aside the baking tray to let it cool down for about 15 minutes and when it is safe, pick the ramekins out of the water and place them on a cooling wire rack for another 15 minutes.
- Once all are cooled down, cover each ramekin with a plastic wrap and refrigerate them. You will have to at least keep them in the fridge for 4 hours to completely chill them or if you are in no hurry you can keep them up to 4 days in the fridge.
Caramelising the top
- When you are about to serve, take the custards out from the fridge and sprinkle a teaspoon of sugar over each custard. Spread the sugar evenly over the surface.
- Ignite the torch and move the flame in a circular motion on the surface of sugar. Make sure the sugar is hardened and formed into a caramel-coloured crust.
- Cool the caramelised custards for 2 minutes and serve.
When you are taking a bite, gently crack the caramelised sugar crust with the edge of your spoon and take a good scoop of the creamy custard with the caramelised sugar.
Different Crème Brûlée Versions without the Torch
Caramelising the custard is possible using a broiler in the oven if you don’t have a culinary torch. However, you might not get the perfect sugar crust. It is highly likely that the custard will get warmer. But, don’t worry, there are other ways to serve too other than caramelising sugar.
Caramel Sauce
Instead of caramelising sugar, pour some caramel sauce on the custard. This sauce is easy to make at home. You will only need brown sugar, cream, milk, butter, vanilla extract and a pinch of sea salt to make this mouth-watering sauce.
Chocolate Shavings
You can also put shaved chocolate on top of the custard. The creamy texture of the custard goes really well with chocolate too.
Fresh Berries
You can pick raspberries or a mix of berries to top up the custard. They will be a good substitute for sugar.
Pro Tips for Crème Brûlée
- If you are using vanilla extract instead of the vanilla bean, use the real vanilla extract and avoid using the artificial ones. Apart from vanilla bean and vanilla extract, you can also use vanilla bean paste, which is a bit thicker than vanilla extract.
- If you are using larger ramekins bake the crème brulée for 5 minutes more until the middle of the custards are slightly wobbly.
- You can freeze the custards up to 1 month in the freezer. Make sure that they are covered in plastic wrap before storing in the refrigerator.
The super delicious crème brûlée is truly going to vow your guests. So, what’s stopping you? Start making it right away!